
How to Capture Stunning Sunset Photos While Traveling
Capturing stunning sunset photos while traveling doesn’t require professional gear or years of experience—just the right preparation and technique. Whether you’re standing on a tropical beach, atop a mountain ridge, or beside a quiet lake, golden hour offers a fleeting window of soft, warm light that can transform an ordinary scene into a breathtaking image. With thoughtful planning, understanding of camera settings, and a few practical tips, anyone can take memorable sunset shots that reflect the beauty of their journey. This guide walks you through essential steps, from scouting locations to post-processing, so you can consistently create compelling travel photography.
Plan Ahead: Timing and Location Are Everything
The first step to capturing stunning sunset photos while traveling is knowing when and where the light will be best. Sunsets vary by season, latitude, and local geography, so relying on generic advice won’t cut it. Use tools like The Photographer’s Ephemeris or Sun Surveyor to determine the exact time and direction of sunset at your destination. These apps show you not only the timing but also how the sun will align with landmarks, mountains, or bodies of water.
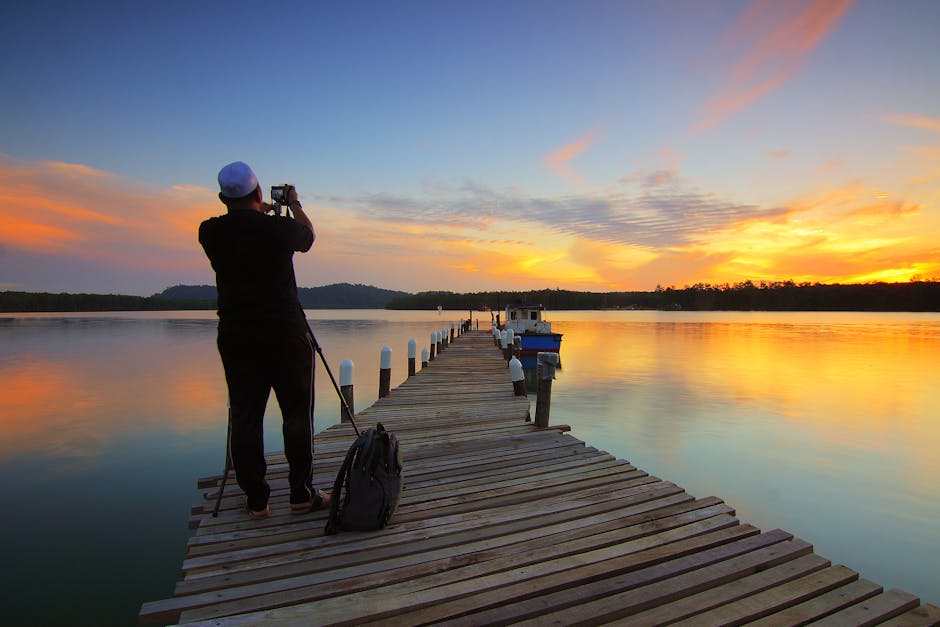
Scout your location during daylight if possible. Look for unobstructed western views and interesting foreground elements—rocks, trees, people, or buildings—that add depth. A lone palm tree silhouetted against a fiery sky or a pier stretching into calm water can anchor your composition. Avoid cluttered or overly busy scenes unless you’re intentionally going for a layered, dynamic look.
Use the Right Gear Without Overpacking
You don’t need a full DSLR kit to take great sunset photos. Many travelers get excellent results with modern smartphones or compact cameras. That said, a few accessories can make a big difference. A lightweight tripod helps stabilize your camera for longer exposures, especially as light fades. Even a small tabletop tripod can prevent blur in low light.
If you’re using a smartphone, consider a clip-on wide-angle or telephoto lens for added versatility. For mirrorless or DSLR users, a standard zoom lens (like a 24–70mm) covers most travel scenarios. A circular polarizing filter can reduce glare and enhance sky contrast, but it’s optional. The key is simplicity: pack only what you’ll actually use.
Master Your Camera Settings
Sunset photography often involves high contrast between bright skies and dark foregrounds. To manage this, switch to manual or aperture priority mode. Start with an aperture between f/8 and f/11 for sharpness across the frame. Use a low ISO (100–400) to minimize noise, especially in shadow areas.
Set your shutter speed based on the available light. Early in the sunset, you may use 1/60s or faster; as it darkens, you might drop to 1/15s or slower—hence the value of a tripod. Enable exposure compensation to fine-tune brightness. If your camera has a histogram, use it to check for blown highlights or crushed shadows.
Bracket Your Shots for Better Dynamic Range
Most cameras and smartphones offer exposure bracketing—taking multiple shots at different exposures. This is especially useful for sunsets, where the sky may be much brighter than the land. Later, you can blend these images in post-processing using HDR software or manual layering in tools like Adobe Lightroom or Photoshop.
For example, one exposure might correctly expose the sky, while another brightens the foreground. Blending them preserves detail in both areas. If your camera doesn’t support bracketing, manually adjust exposure between shots.
Compose with Intention
A strong composition turns a pretty sunset into a powerful image. Use the rule of thirds: place the horizon on the lower third line to emphasize the sky, or the upper third to highlight the foreground. Include leading lines—roads, shorelines, or fences—that draw the eye toward the sun.
Silhouettes work beautifully at sunset. Position a person, animal, or structure between you and the sun, underexpose slightly, and let the subject become a dark shape against the glowing background. This technique adds drama and scale.
Avoid centering the sun unless it’s part of a symmetrical scene. Off-center placements often feel more dynamic. Also, watch for distracting elements like power lines, trash bins, or crowds. A clean frame keeps attention on the sunset itself.
Shoot in RAW for Greater Flexibility
If your camera supports it, shoot in RAW format instead of JPEG. RAW files contain more image data, giving you greater control during editing. You can recover highlights, lift shadows, and adjust white balance without degrading quality. This is especially helpful when dealing with the extreme tonal range of a sunset.
Smartphones increasingly offer RAW capture through third-party apps like ProCamera (iOS) or Open Camera (Android). While not as robust as camera RAW files, they still provide more editing headroom than standard JPEGs.
Timing: Beyond the Main Event
The actual sunset lasts only a few minutes, but the best light often extends before and after. Arrive 30–45 minutes early to set up and capture the “golden hour” leading up to sunset, when the light is soft and warm. Stay 15–30 minutes after the sun dips below the horizon to catch the “blue hour,” when the sky turns deep blue and artificial lights begin to glow.
Each phase offers unique moods. Golden hour is ideal for portraits and warm landscapes; blue hour suits cityscapes and reflections. Planning for both maximizes your shooting window.
Editing Tips to Enhance, Not Overdo
Post-processing should enhance your sunset photo, not replace good technique. Start with basic adjustments: correct exposure, contrast, and white balance. Boost vibrance slightly to bring out sunset colors, but avoid oversaturating skies into unnatural oranges and purples.
Use graduated filters in Lightroom or similar tools to darken the sky or brighten the foreground. Dodge and burn techniques can add depth, but subtlety is key. Sharpen selectively and reduce noise if needed, especially in shadow areas.
Resist the urge to over-edit. A natural-looking sunset often resonates more than a heavily filtered one. Save dramatic edits for creative projects, not documentary travel photography.
Common Mistakes to Avoid
Even experienced travelers make errors when photographing sunsets. One common mistake is arriving too late. The sky can change dramatically in minutes, so punctuality matters. Another is relying solely on auto mode, which often overexposes the sky or underexposes the land.
Don’t forget to check your lens for fingerprints or smudges—these become more visible in backlit conditions. Also, avoid shooting directly into the sun without a lens hood or proper filtration, as this can cause lens flare. If flare occurs, use it creatively or shield the lens with your hand or a hat.
Finally, don’t let photography ruin the experience. Take a few shots, then put the camera down and enjoy the moment. The best travel memories often come from being present, not just documenting.
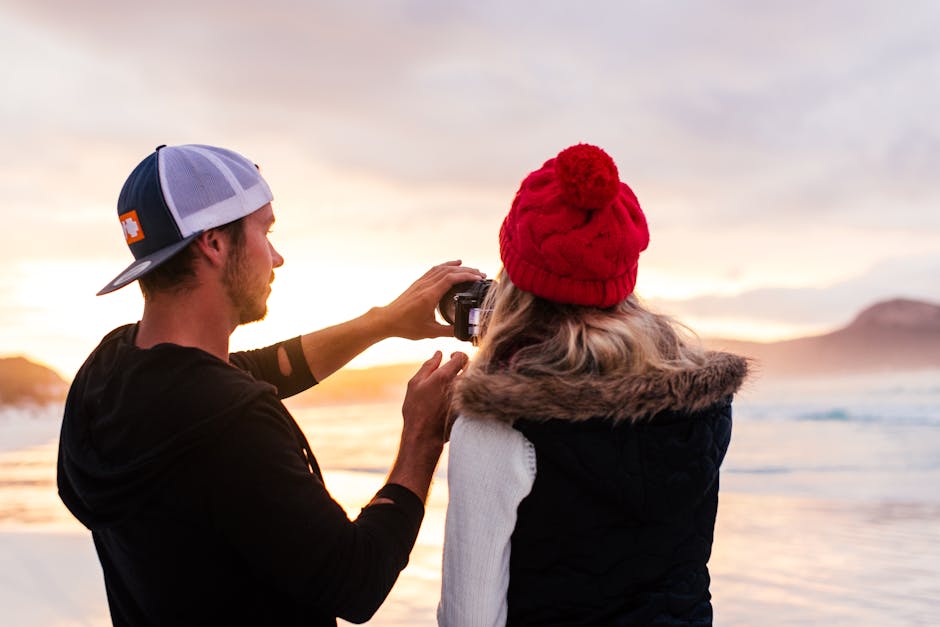
Compare: Smartphone vs. Camera for Sunset Photography
| Feature | Smartphone | DSLR/Mirrorless Camera |
|---|---|---|
| Portability | Excellent—always with you | Good—requires carrying gear |
| Image Quality (Low Light) | Good (with newer models) | Excellent (larger sensor) |
| Manual Control | Limited (via apps) | Full control |
| RAW Support | Yes (with third-party apps) | Yes (standard) |
| Ease of Use | Very easy | Requires learning |
Final Thoughts
Learning how to capture stunning sunset photos while traveling is less about gear and more about preparation, timing, and technique. With the right approach, even a smartphone can produce images that reflect the magic of a fleeting moment. Focus on composition, use manual settings when possible, and don’t underestimate the power of arriving early and staying late. Most importantly, let the experience guide your lens—some of the best shots come from quiet observation, not forced framing.
FAQ
What’s the best time to arrive for sunset photography?
Arrive 30–45 minutes before sunset to scout, set up, and capture the golden hour. Stay 15–30 minutes after to take advantage of the blue hour.
Can I take great sunset photos with just a smartphone?
Yes. Modern smartphones capture high-quality images, especially in good light. Use manual apps, a tripod, and editing tools to enhance results.
Should I use HDR mode for sunset photos?
HDR can help balance exposure, but it may look unnatural if overused. Bracketing and manual blending often yield more controlled, realistic results.